
How to Attach a Velcro Patch
A velcro patch attaches to fabric through a two-part hook-and-loop system, where the loop side fixes to the garment and the hook side sits on the patch back. This guide gives you the exact steps to attach a velcro patch by sewing, by adhesive, or by heat. Custom Patches manufactures hook-and-loop patches across the UK, so these instructions match the backing types we supply to military, workwear, and club customers every day.
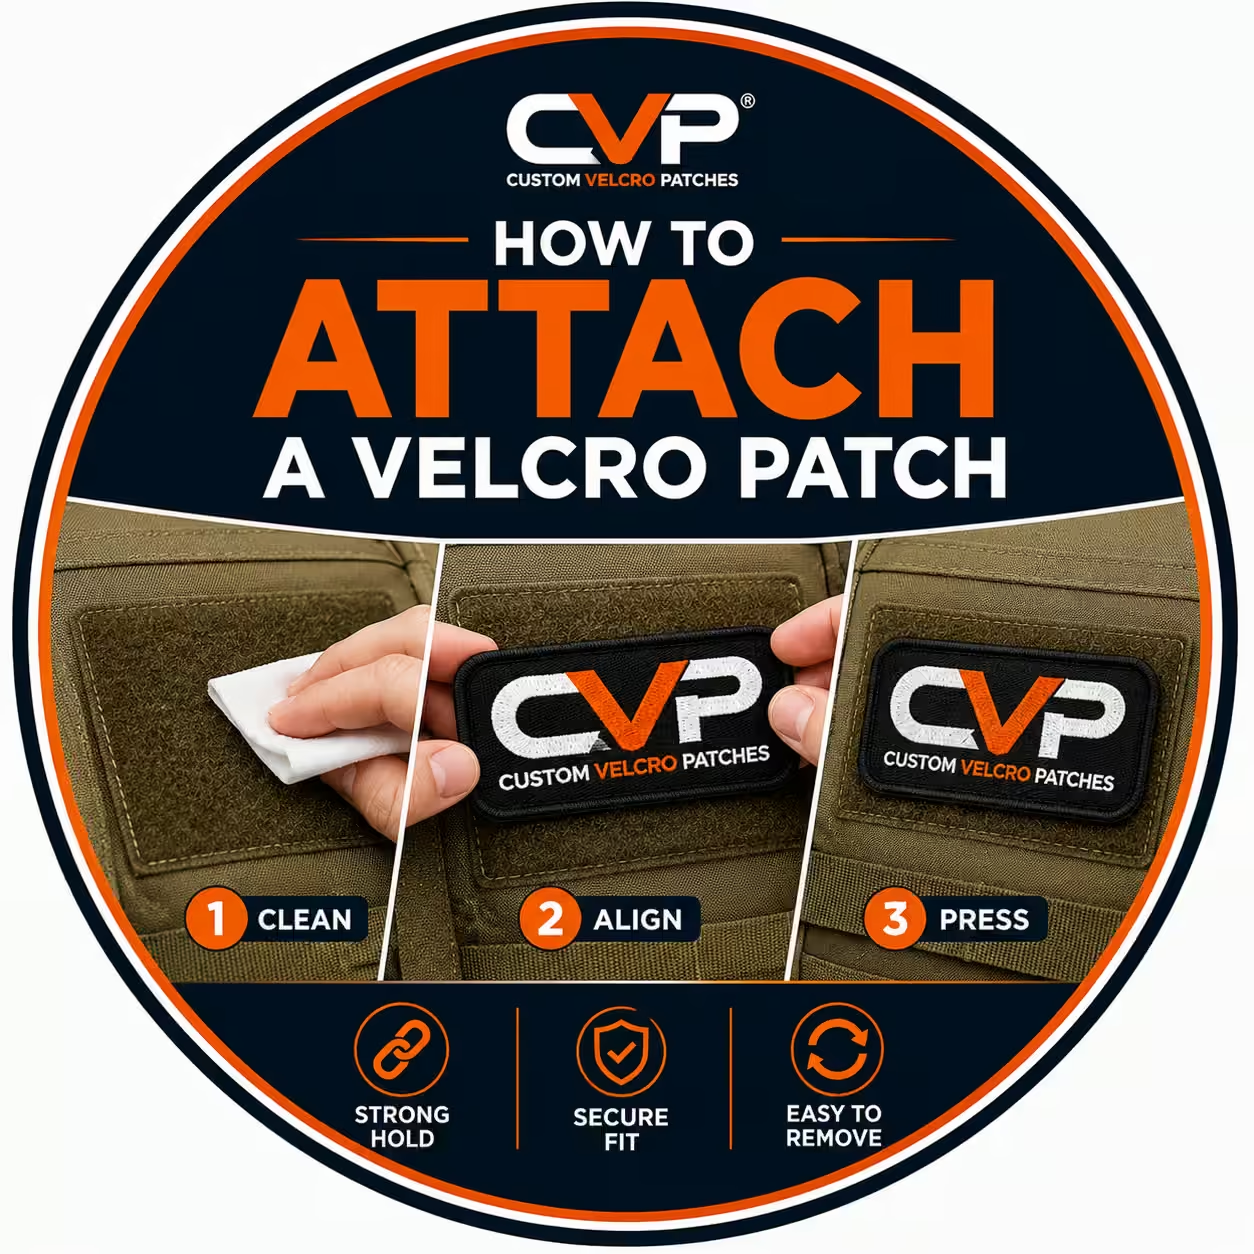
What You Need to Attach a Velcro Patch
Attaching a velcro patch requires a small, predictable kit, and the exact tools depend on the method you choose. A velcro patch already carries the hook side on its back, so most of your kit goes towards fixing the loop side to the garment. Gather your supplies before you start, because a clean, single-pass attachment lasts longer than a rushed one.
You will need the following:
- The velcro patch - your embroidered, woven, or PVC patch with a hook backing
- Loop tape or loop fabric - sew-on, self-adhesive, or iron-on, to match the garment side
- A needle and strong polyester thread - for the sew-on method
- Fabric glue - for the no-sew method
- An iron and a thin pressing cloth - for the iron-on loop method
- Sharp scissors - to trim the loop tape to the patch size
- A fabric marker or tailor's chalk - to mark the exact position
Each method uses a different subset of this kit. The sew-on route needs the needle and thread, the no-sew route needs glue or self-adhesive loop, and the heat route needs the iron. Choose your method first, then pull only the tools that method demands.
How a Velcro Patch Attaches: Hook Side vs Loop Side
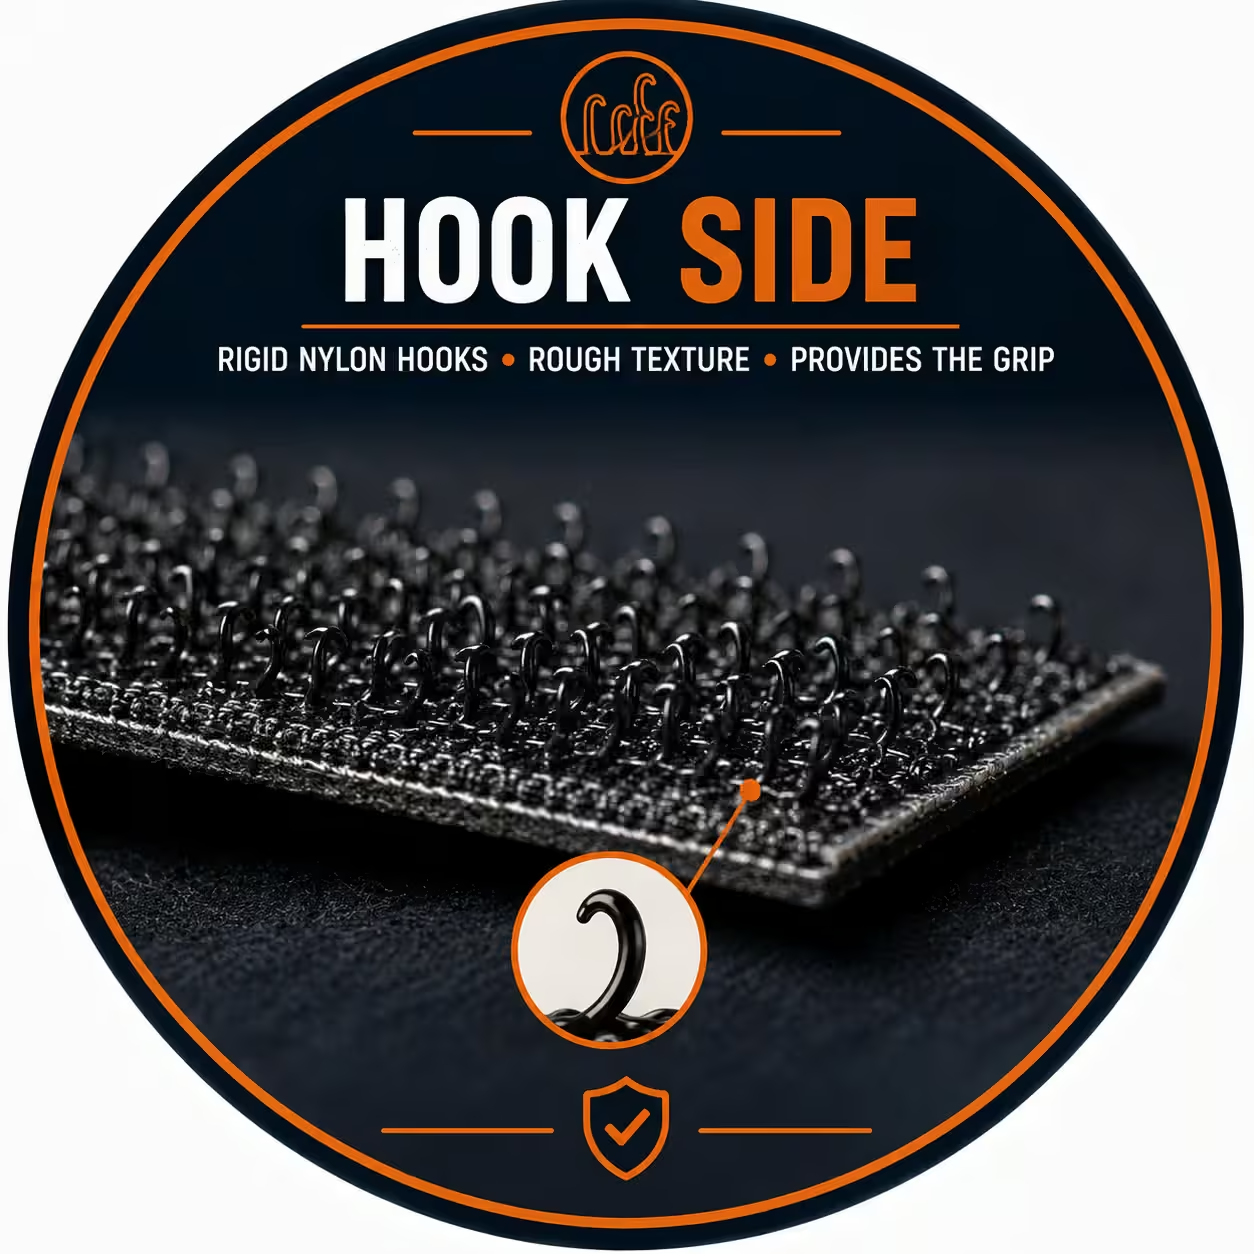
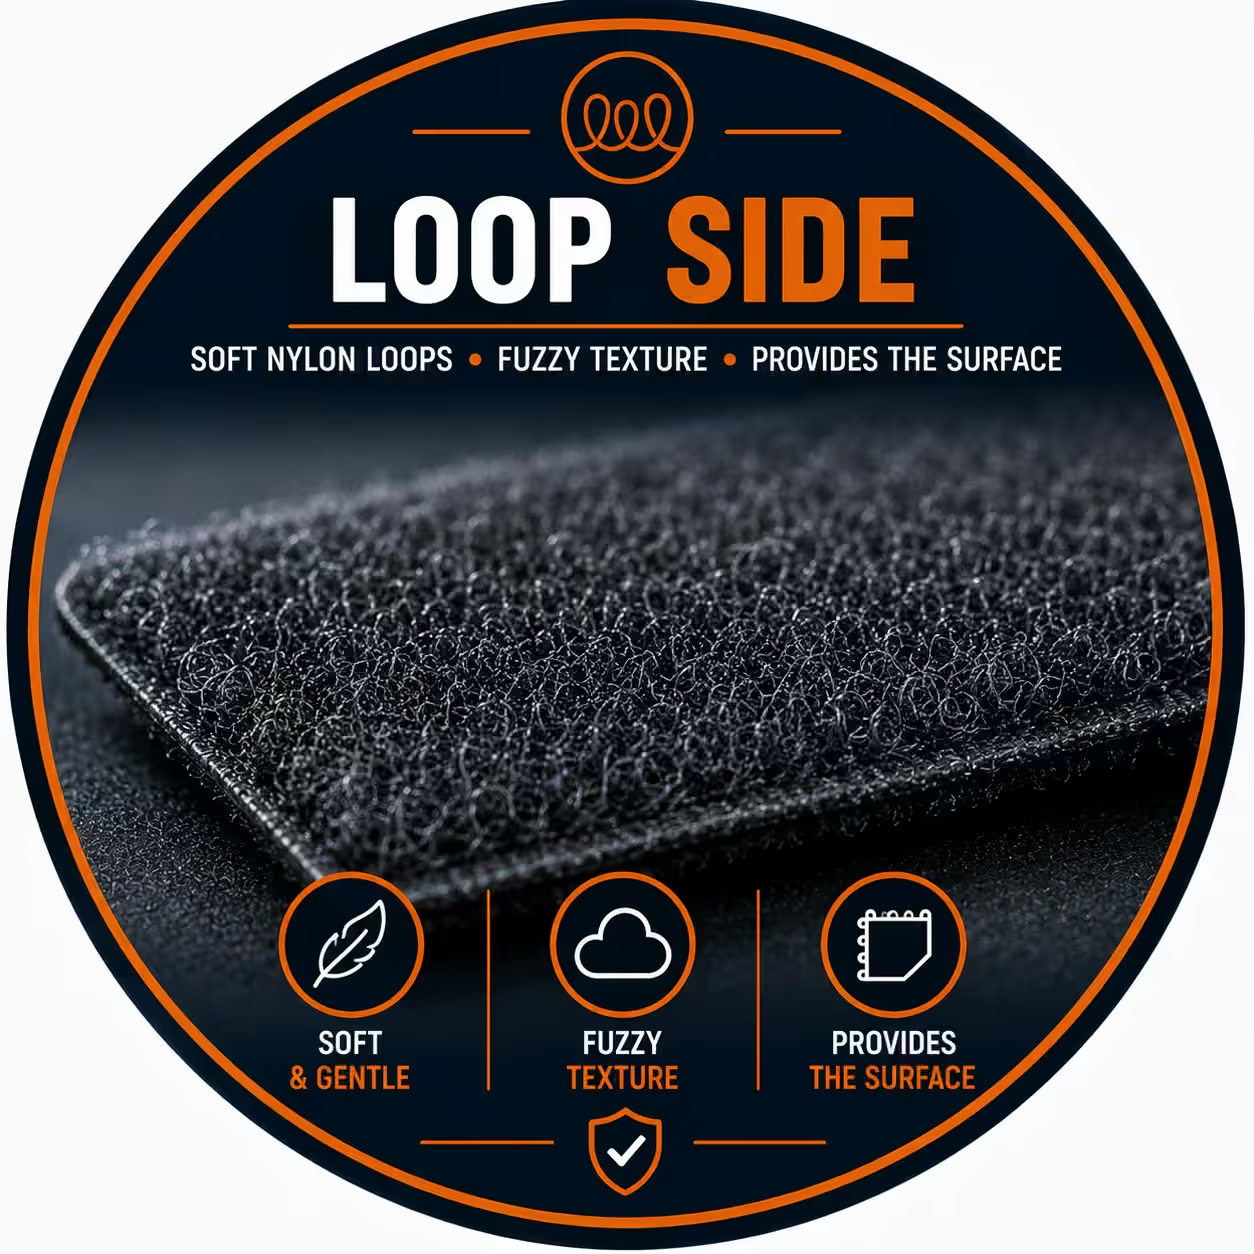
A velcro patch works because two surfaces grip each other, and naming those surfaces correctly prevents the most common attachment mistake. The hook side carries thousands of tiny stiff hooks, and the loop side carries soft, dense fibres. The hooks catch the loops on contact, the bond holds firm under tension, and a firm peel releases it. Knowing which surface goes where is the difference between a patch that holds and one that falls off. For a deeper breakdown, our guide on hook side vs loop side explains how each surface is manufactured.
Which Side Goes on the Patch
The hook side goes on the patch. The hook is the rough, scratchy surface, and it bonds permanently to the patch back during manufacture. Custom Patches applies the hook backing to your patch before despatch, so your patch arrives ready to fix to a garment. You never need to add the hook side yourself unless you are converting a plain patch, which we cover later in this guide.
Which Side Goes on the Garment
The loop side goes on the garment. The loop is the soft, fuzzy surface, and it sits on the jacket, cap, bag, or uniform where you want the patch to live. You attach the loop side once, and the patch then presses on and peels off as many times as you like. Uniform managers fit a single loop panel to a sleeve or chest area, and staff swap name, rank, or role patches onto that panel without any further sewing.
How to Attach a Velcro Patch by Sewing (Strongest Method)
Sewing the loop side onto the garment creates the strongest and most durable attachment, and it is the method UK military, cadet, and workwear customers choose for daily-wear gear. A sewn loop base withstands repeated patch changes, machine washing, and heavy field use without lifting. The patch itself still presses on and peels off freely; only the loop base is permanent. Set aside ten to fifteen minutes per patch and work on a flat surface.
Step-by-Step Sew-On Instructions
Follow these steps in order for a secure, professional finish:
Position the loop tape.
Place the loop side on the garment where the patch will sit.
Mark the spot.
Outline the loop tape with tailor's chalk so you keep it square.
Pin the loop side.
Pin the loop tape to the fabric to stop it shifting as you stitch.
Thread the needle.
Use strong polyester thread and a heavy-duty or denim needle.
Stitch the perimeter.
Sew a tight running stitch around the full edge of the loop tape.
Keep the stitches close.
Place stitches 2–3 mm apart so the edge cannot peel back.
Knot and trim.
Tie a firm knot on the inside of the garment and trim loose threads.
Press the patch on.
Align the hook patch over the loop base and press firmly.
Your velcro patch now holds on a permanent loop base, and you can remove it for washing or replace it whenever your design changes. Work the needle through both the loop tape and the garment fabric on every stitch, because a stitch that catches only the tape will pull free under load.
Best Needle and Thread for Velcro Backing
A heavy-duty needle and bonded polyester thread give the best results on velcro backing. The loop tape and patch backing are dense, so a fine needle bends or snaps against them. A denim or leather needle pierces the dense weave cleanly, and bonded polyester thread resists abrasion from repeated patch changes. Match the thread colour to the loop tape rather than the patch, since the loop base stays visible when the patch is removed. For a full comparison of attachment bases, see our guide on sew-on vs adhesive loop.
How to Attach a Velcro Patch Without Sewing
A velcro patch attaches without sewing through self-adhesive loop backing, fabric glue, or iron-on loop tape. The no-sew route suits anyone who lacks a needle, works with awkward fabrics, or needs a fast result. Each no-sew method fixes the loop side to the garment, and the hook patch then presses on as normal. The bond holds well for light to medium wear, though a sewn base still outlasts every adhesive option for heavy daily use.
Self-Adhesive (Peel-and-Stick) Loop Backing
Self-adhesive loop backing attaches in under a minute and needs no tools. The loop tape carries a dry adhesive layer protected by a peel-off film, and the adhesive grips smooth, clean fabric on contact. This method works best on tightly woven cotton, polyester, and nylon, where the surface stays flat and free of fibres.
- Clean the fabric. Wipe the garment area with a damp cloth and let it dry fully.
- Cut the loop tape. Trim the loop backing to match your patch shape.
- Peel the film. Remove the protective film from the adhesive side.
- Press the loop down. Position the loop tape and press firmly for thirty seconds.
- Wait to cure. Leave the adhesive for 24 hours before attaching the patch.
- Press the patch on. Align the hook patch and press it onto the loop base.
The adhesive reaches full strength after curing, so the 24-hour wait protects the bond. Self-adhesive loop suits caps, bags, and indoor gear, but it lifts faster on stretchy or textured fabric than a sewn base does.
Fabric Glue Method
Fabric glue creates a strong, water-resistant bond once it cures, and it fixes loop tape to fabrics that resist adhesive film. Fabric glue penetrates canvas, denim, and heavy cotton, so it holds on jackets, jeans, and tote bags that face frequent washing. Choose a flexible, washable fabric glue rather than craft glue, because rigid glue cracks and releases under movement.
- Clean both surfaces. Wipe the fabric and the loop tape back so they are dry and dust-free.
- Apply a thin layer. Spread an even coat of fabric glue on the loop tape back.
- Press onto the fabric. Position the loop tape and press it down firmly.
- Weight it down. Place a flat weight over the tape to keep contact even.
- Cure fully. Leave the glue for 24–48 hours before attaching the patch.
- Press the patch on. Fix the hook patch onto the cured loop base.
Fabric glue rewards patience, so resist testing the bond early. For heavy-duty items, sew a few stitches around the loop edge after the glue cures, since glue plus stitching outperforms either method alone.
Iron-On Loop Tape
Iron-on loop tape attaches with heat, but you must iron only the loop side, never the hook side. The loop tape carries a heat-activated adhesive that bonds to fabric under a warm iron. The hook side, by contrast, is synthetic, and direct heat melts the hooks and destroys the grip. This single rule separates a clean attachment from a ruined patch.
- Set the iron. Heat the iron to 120–150 °C, matching the garment fabric.
- Position the loop tape. Place the loop side, adhesive down, where the patch will sit.
- Cover with a cloth. Lay a thin pressing cloth over the loop tape.
- Press firmly. Hold steady pressure for 30–40 seconds without sliding the iron.
- Let it cool. Allow the fabric to cool completely before testing.
- Press the patch on. Attach the hook patch to the bonded loop base by hand.
The patch attaches by hand, never by iron, so the hooks stay intact for hundreds of cycles. Iron-on loop suits heat-tolerant cotton and polyester, but it is unsuitable for waterproof or coated fabrics that scorch. For washing guidance once your patch is fitted, see our advice on washing and care for velcro patches.
How to Add Velcro to a Plain Patch
Adding velcro to a plain patch means fixing the hook side to the patch back yourself, which converts a sew-on or iron-on patch into a removable hook-and-loop patch. This task differs from attaching a finished velcro patch, because here you start with a patch that has no hook backing. The conversion uses the same tools as the no-sew methods, applied to the patch rather than the garment.
Step-by-Step Conversion
Clean the patch back.
Remove loose threads and dust from the rear of the patch.
Cut the hook tape.
Trim self-adhesive hook tape to match the patch outline.
Apply the hook side.
Peel the film and press the hook tape onto the patch back.
Bond firmly.
Hold steady pressure for thirty seconds, then leave it to cure.
Reinforce if needed.
Stitch the hook edge for heavy use, since glue alone can lift.
Fit the loop side.
Attach loop tape to the garment using any method above.
Your plain patch now carries a hook backing and presses onto any loop surface. Most UK buyers skip this step entirely, because Custom Patches applies the hook backing during manufacture, so every patch we supply arrives ready to attach. Ordering a hook backing from the start saves time and gives a stronger, factory-pressed bond than a home conversion.
Attaching Velcro Patches by Surface
A velcro patch attaches differently depending on the surface, because fabric weight, heat tolerance, and shape all change the best method. Smooth cotton accepts adhesive and heat well, while structured caps and coated tactical gear demand a sewn or panel-based fit. Match the method to the surface, and the patch holds longer with less effort.

Jackets and Workwear
Jackets and workwear hold velcro patches best with a sewn loop base. Work garments face daily abrasion, frequent washing, and outdoor weather, so a stitched loop panel resists lifting where adhesive fails. Position the loop base on the sleeve or chest, and staff then swap branded patches across a uniform fleet without re-sewing.

Caps and Hats
Caps and hats take velcro patches on the front panel, fitted with self-adhesive or sewn loop. The structured front panel gives a flat, stable surface for the loop tape. Avoid ironing curved or foam-backed caps, since heat warps the panel and melts the structure. A small sewn loop square on the front gives the cleanest, longest-lasting result.

Backpacks and Tactical / MOLLE Gear
Backpacks and tactical gear often carry a built-in loop panel, so the patch presses straight on with no attachment step. MOLLE webbing and field gear ship with loop fields designed for hook-backed patches, which lets military and outdoor users reconfigure morale and identification patches in seconds. Where no panel exists, sew or glue a loop patch onto the bag fabric, choosing a hard-wearing base for outdoor use.

School and Scout Uniforms
School and Scout uniforms suit velcro patches when badges change often, fitted with a sewn or iron-on loop base. Pupils earn and replace badges across terms, so a removable hook-and-loop system saves parents from re-sewing each one. Fit one loop panel per badge position, and swap crests, names, or achievement badges as they update.
Sewing vs Adhesive vs Iron-On: Which Method to Choose
The best attachment method depends on how hard the patch will work, because strength, removability, and skill requirements differ across the three routes. Sewing gives the strongest base, adhesive gives the fastest fit, and iron-on sits between the two. Match the method to the garment and the wear it will face, then commit to one route per patch.
| Method | Strength | Removable | Best For | Skill Needed |
|---|---|---|---|---|
| Sew-on loop | Strongest, permanent base | Patch yes, base no | Workwear, military, daily use | Basic hand-sewing |
| Self-adhesive loop | Medium, semi-permanent | Patch yes | Quick jobs, smooth fabric | None |
| Fabric glue | Medium–strong once cured | Patch yes | Bags, canvas, heavy cotton | None |
| Iron-on loop tape | Medium | Patch yes | Cotton and polyester garments | Iron, plus care |
The table shows a clear pattern: durability rises with effort. Choose the sewn loop for gear that lives outdoors or washes weekly, and choose adhesive or heat for quick, low-stress jobs. Every method keeps the patch itself removable, so you lose no flexibility by picking the stronger base. For a focused comparison of the two leading options, read our guide on sew-on vs adhesive loop.
Caring for Your Velcro Patch
A velcro patch lasts longer when you remove it before washing and keep the hook side clean. The hooks collect lint, fibres, and grit over time, and a clogged hook surface grips weakly. Simple maintenance restores the bond and protects both the patch and the garment.
- Remove the patch before washing. Peel the patch off and machine wash the garment alone.
- Fasten loose hook tape. Press any exposed hook side to its loop base before washing to stop snagging.
- Clean the hook side. Pick out lint with tweezers and brush the hooks lightly to restore grip.
- Store patches flat. Keep spare patches in a cool, dry place to protect the backing.
Clean hooks grip like new, so a minute of maintenance saves a patch that feels worn out. Outdoor and field users benefit most, since dust and moisture clog the hook surface fastest. Our full guide on washing and care for velcro patches covers wash temperatures and drying in detail.
Our Customer Reviews
Frequently Asked Questions
Can you iron a velcro patch directly?
Can you wash clothing with a velcro patch attached?
Which side of the velcro goes on the patch?
Do velcro patches need sewing?
Is "Velcro" the correct name for these patches?
Order Custom Velcro Patches in the UK
Attaching a velcro patch comes down to three choices: sew the loop base for maximum strength, glue or stick it for a fast no-sew fit, or iron the loop side for a heat bond on cotton and polyester. Whichever route you take, the hook side belongs on the patch and the loop side belongs on the garment, and the patch then presses on and peels off freely for years.
Custom Patches manufactures bespoke hook-and-loop patches across the UK, and every patch arrives with the hook backing already applied. We offer a free design service, low minimum orders, and fast tracked delivery, so your patches reach you ready to attach. Order custom velcro patches today and get a free quote on your bespoke design.